Showing posts with label tutorial. Show all posts

Thursday, March 26, 2015

VIDEO: How to paint a 15mm Sci-FI Miniature

Hi everyone!

I have put together a video showing every step I take painting a 15mm HADES Ghost Team Sniper Operative.


I go over paint choices, brush choices and techniques.

 I hope you folks enjoy it and find it useful, please let me know if you have any feedback!

 The HADES Ghost Team Squad is available from http;//www.clearhorizonminiatures.com

Thanks!

Sunday, June 8, 2014

Video Tutorial - how to make flight stands for 15mm aircraft and VTOLs

Hi everyone,
I've completed my next tutorial, how to make flight stands for 15mm aircraft and VTOLs!


Start with this : 

And end with:


Thanks!

Thursday, June 5, 2014

How to Paint a 15mm Miniature - Step-by-Step - ClearHorizon Minis "Hell Diver" Miniature

Hi everyone,

I have our next Step-by-Step 15mm painting tutorial up on Youtube:


In this video we go over how to paint a ClearHorizon Miniatures "Hell Diver".

Availible here: clearhorizonminiatures.com/store

Check it out, and let me know if you have any questions!

Also, keep an eye out for our next video where we'll be going over how to base 15mm miniatures!

Thanks!

Wednesday, February 26, 2014

Video - Applying a Liquid Masking to a 15mm Scale Raven VTOL

Hi everyone,

I've posted another video up, this time on how to apply liquid masking agent around the canopy of a Raven VTOL.

I also ramble about airbrush painting and a variety of other things.

Check it out here:


Tuesday, October 29, 2013

"Gem Effect" Tutorial - Painting 15mm Visors on the "Hell Divers"

Hi everyone,

I've been painting up some of my Hell Divers, and I decided to do a "Gem" effect on the visor.

Here is an example of two painted visors:


I start with a dark blue, almost black as the base (mixing the base blue and black):


Then, highlighting from "bottom to top" I paint the base blue in the bottom and left corners:


An example of what my palette looks like:


Next, I add a bit of white, and then do a thin line (about half of the base blue width) along the left edge.  If you do too much, you can black line it, or use a wash (like Army Painter Dark Tone) to get the black outline around the visor again.


What my palette looks like after adding white:


Adding a bit more white gives me a very light blue color, and I add that as thin as I can to the lower left edge:


After that, I add two dots of white to the upper right part.  This usually takes me two or three tries to get it nice and round and where I want.  If you need to go over it just mix a bit of your base with black to get the color back so you can try the white dot again:


After that I will add a gloss coat to make it even shinier, since in 15mm I find that it really helps add a focal point to the face.

And here is a picture from the side:


I originally tried red, but it made them look a bit too like evil henchmen (Cobra!!), so I'm very happy with the blue, works well with the khaki scheme too.

Thanks!


Friday, December 28, 2012

NuCoal Coalition Mark X Sentry Class Mech - Build-up Pictures


All the pieces laid out.  There are a lot of different options! Three weapon options for each arm, two different arms (for posing) missile launchers, and three different hull mounted weapons (Chain gun, autocannon, none).  This picture shows the small amount of flash on some of the pieces. Most of them were very clean.


I've assembled the legs here in a pose that is slightly dynamic and stable.  I will be magnetizing the hull.


These are fit tests after I assembled the Hull and a quick size comparison.  This thing is a beast!


The rare-earth magnets I use are from Harbor Freight tools. 


I drilled a hole in the center here with a dremel tool.  I painted the different poles so I would not get them mixed up, you can see some of the paint on there.


The resin is pretty light, so the magnets hold it together great, and it allows it to turn on it's axis.


Finished assembling the monster.  I still have tons of parts left over!


It was pretty cold in the garage, so after priming it I stuck it (kinda) close to a heat source, just to keep it around 70' F.


I covered it in Silly Putty for the camo masking.  Then I used a grey primer to get the second layer on it.  Really not a lot of planning went into the masking, you just have to remember you're basically working in reverse, so wherever the masking is going it will remain the undercoat color.


After removing the masking and washing the whole thing down with devlan mud I start by using a dark grey to highlight the black.


Here I've decided to paint the cockpit, I'v used the "jewel" technique, and i'm about 80% happy with it.  I also coated it with gloss varnish.


I've started going over the light grey with a darker grey to more closely match the other vehicles I have.  I also leave some of the light grey/devlan mud wash visible to give it more of a texture.


The top is completed with the dark grey, now the legs.


The legs get the treatment, and the weapons get painted black.


Highlighting is done, on to applying the decals.


I'm using Heavy Gear Nucoal decals.  I don't know much about the background, but I like the decals, so that's good enough for me :)


I paint gloss varnish in the areas for the decals first, then I apply the decals with a paint brush.  I then apply some Micro-Sol setting solution and allow that to dry. I then go over them with a couple of coats of the Vallejo Matte Varnish.  Once that drys I then paint the whole thing with the same Matte Varnish.  I like using the paint on varnish because I've had some issues with the spray varnish.


I'll be taking better pictures soon, but here is a completed force.  About 175 points in Gruntz.  This thing is a monster, and you can't beat it for $35 US + shipping.  

If you want one of your own contact Danny at mechorder@gmail.com


EDIT:  As requested here is the mech on a cutting board.  Each squad is an inch for size.


Saturday, September 29, 2012

Lava field build.


Hello all its Flick,
Mr. Harold’s table top brother in arms and silent contributor to Clear Horizons.  I’d like to thank you all for your comments on our work. Harold has ask me to post some picks of my lava field build’s sooooo here I go. I hope you enjoy them and I hope they inspire you.
Thank you.

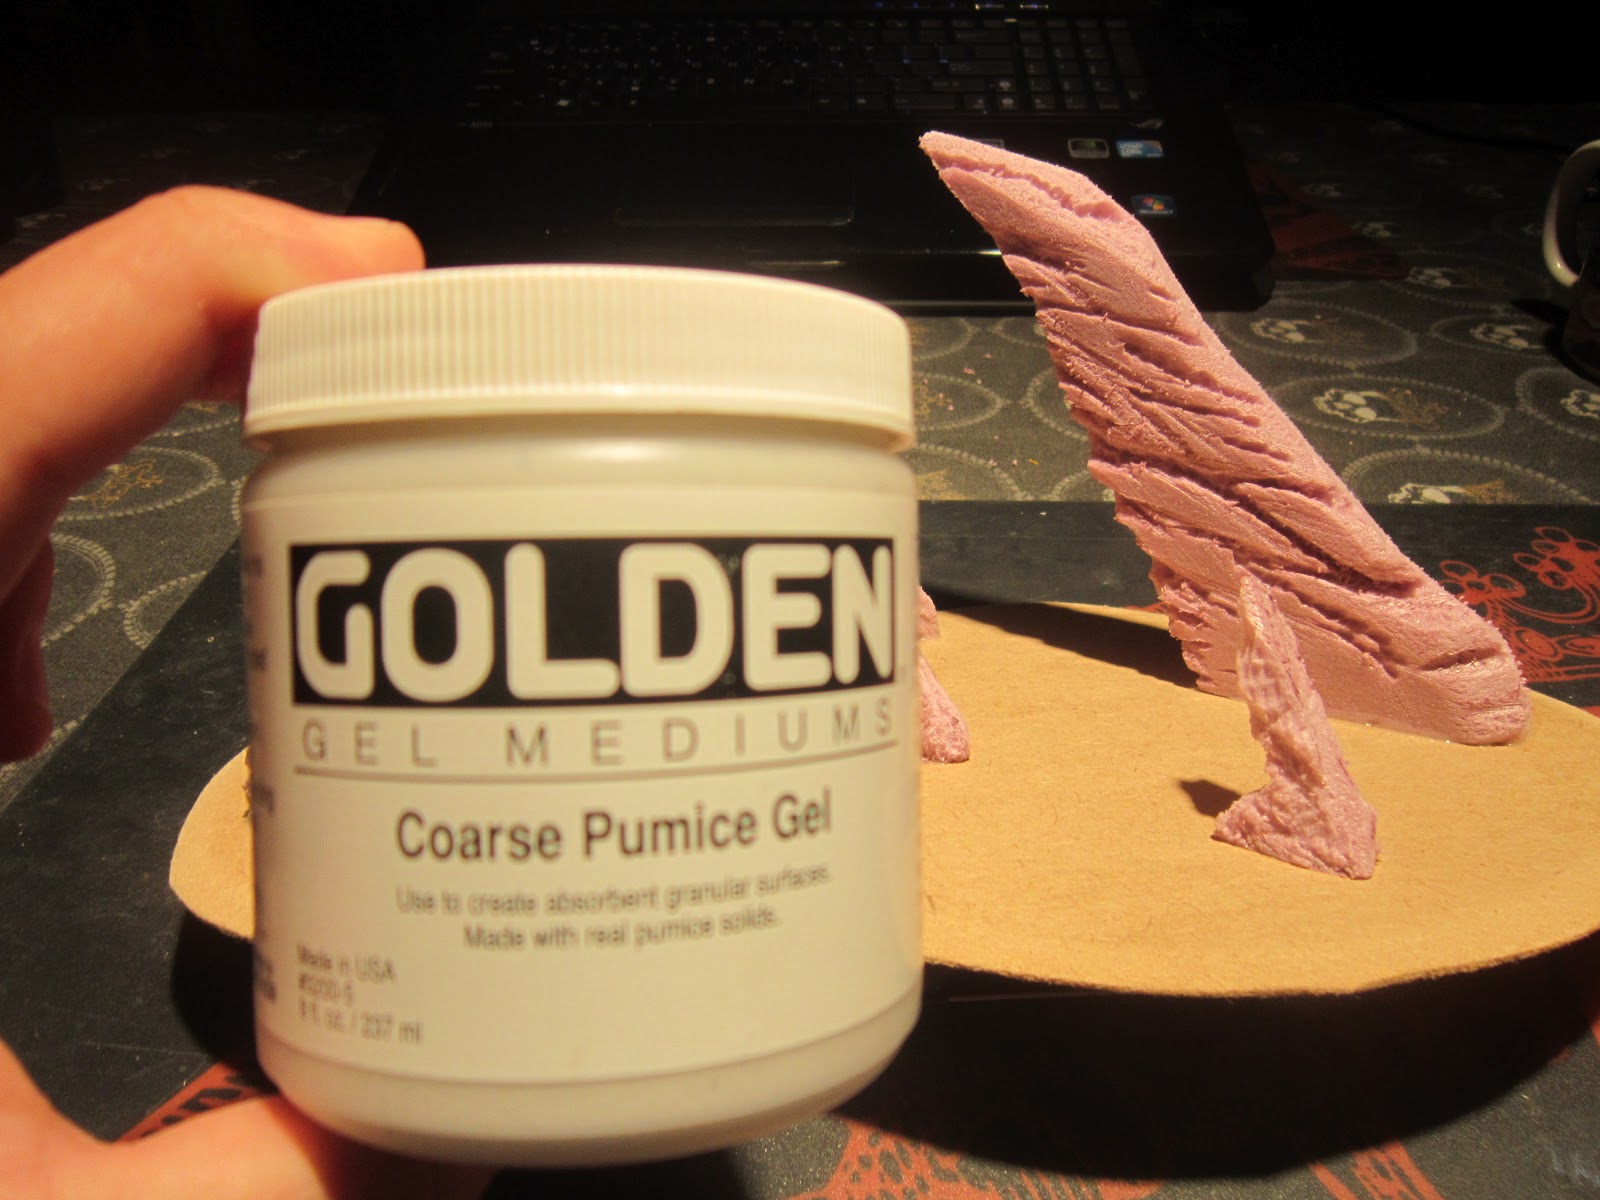
For this build I used dense pink foam used in home insulation that can be bought at most big hardware stores like Lows or Home depot. The base is just hard board like Masonite, some white glue to hold the whole this together, sand paper and versus other tools like knives and tweezers to cut and sculpt the foam into rock forms. 


Next cut the Base board to the shape you want and sand the edges so you get a smother transition from your playing surface to your piece.


Now the fun part! Cut the foam into the size and shape you want your rocks to be “don’t worry if it’s not perfect remember real rocks aren't perfect”  when you’re done white glue them to your base.


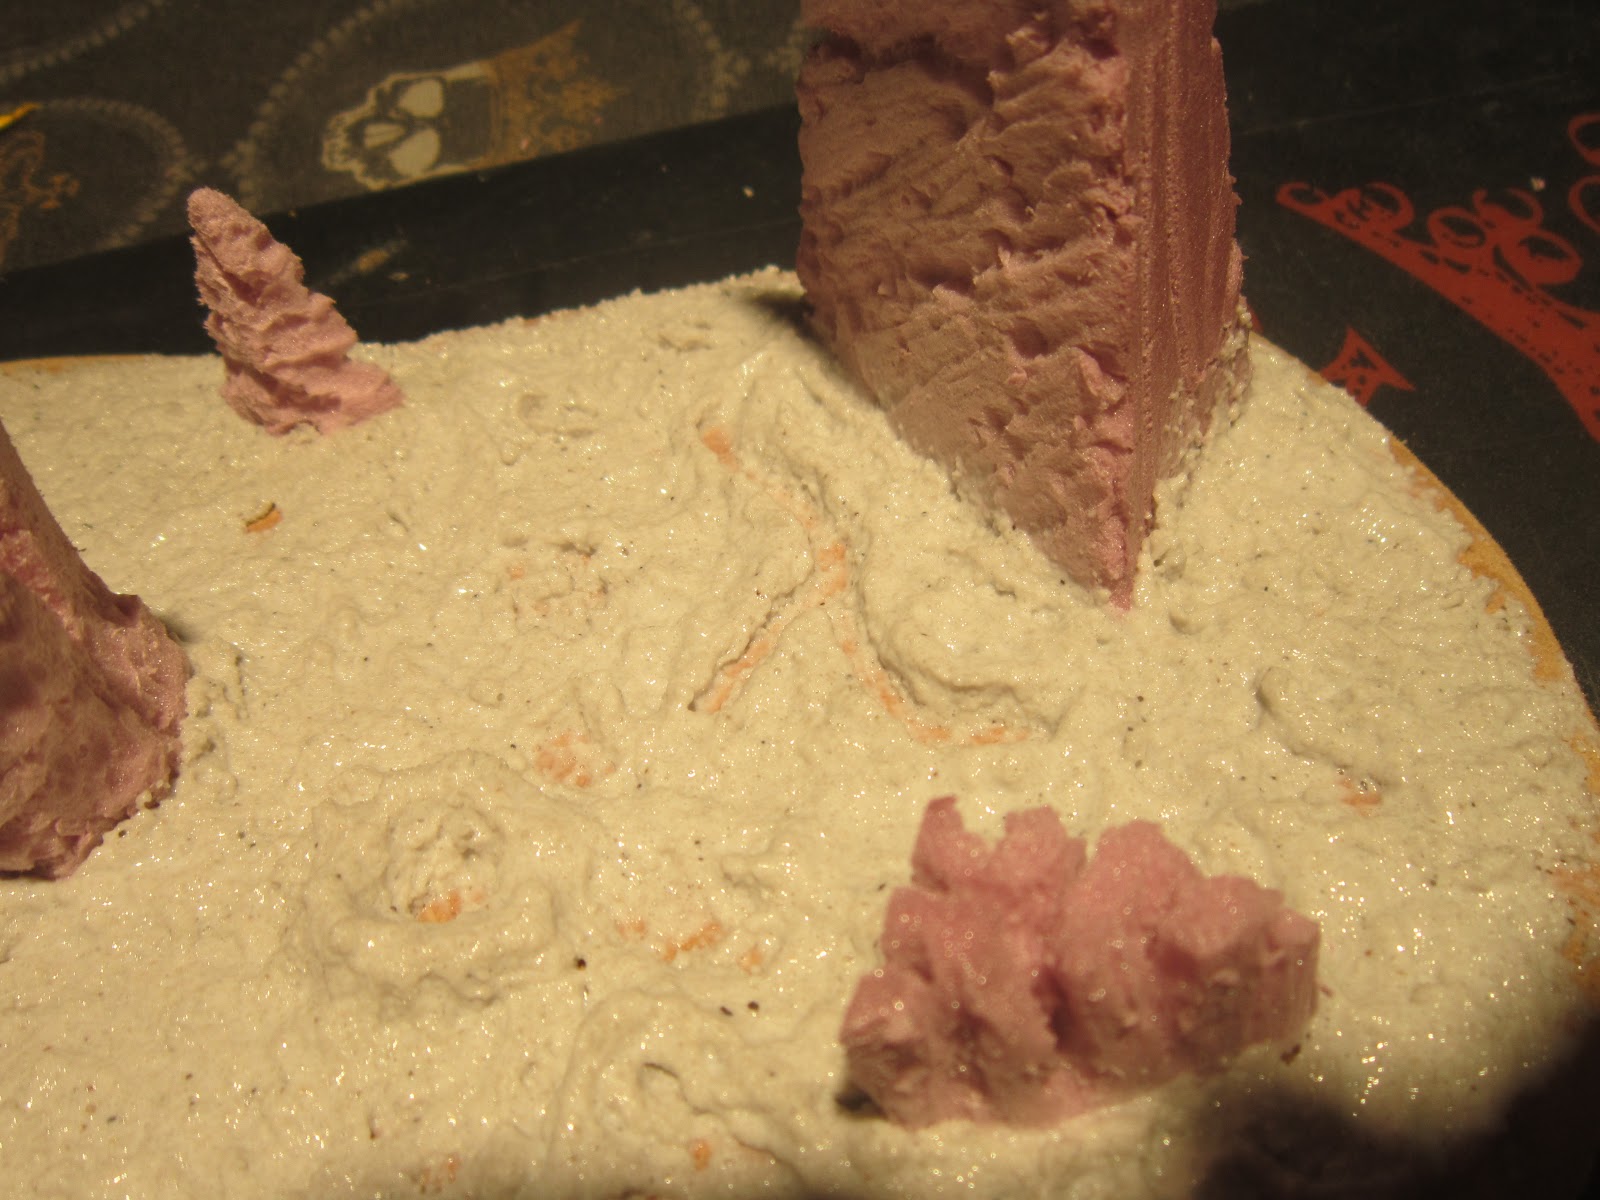
Once your Glue is dry you can start applying the ground basing medium. I like to use Golden gel mediums Coarse Pumice Gel. I apply this with a wet brush so it’s easy to move around the board surface While applying the gel you can make craters and cracks with your brush.  Drying time will vary depending how thick you put it on, I like to let mine dry for at least two days. 


In a few days I will post the paint up. Once the piece has dried and I get home from Work.
Thanks for reading.